Adding Assets To Your Asset Library
Created:
Mar 27, 2018
Updated:
April 25, 2018
See how to add assets to your Vizible VR presentations.
Add an Asset
Vizible relies on the cloud to store and manage the assets for an organization. These include 3D models, audio files, images, and more. Before they can be used in a presentation, they must first be added. Presentation Designer supports two methods for adding files. For more details on importing different kinds of files (3D models, documents, etc.) see the full section on importing content.
Adding a file with the File Dialog

- Select the Assets tab
- Right click in the Assets window to bring up the context menu
- Select Upload Asset to bring up the file selection dialog
- Optionally, change the file filter to only display a specific type of supported asset, like 3D model files
- Select the file you want to upload and click Open
- The asset will be added and uploaded to the cloud
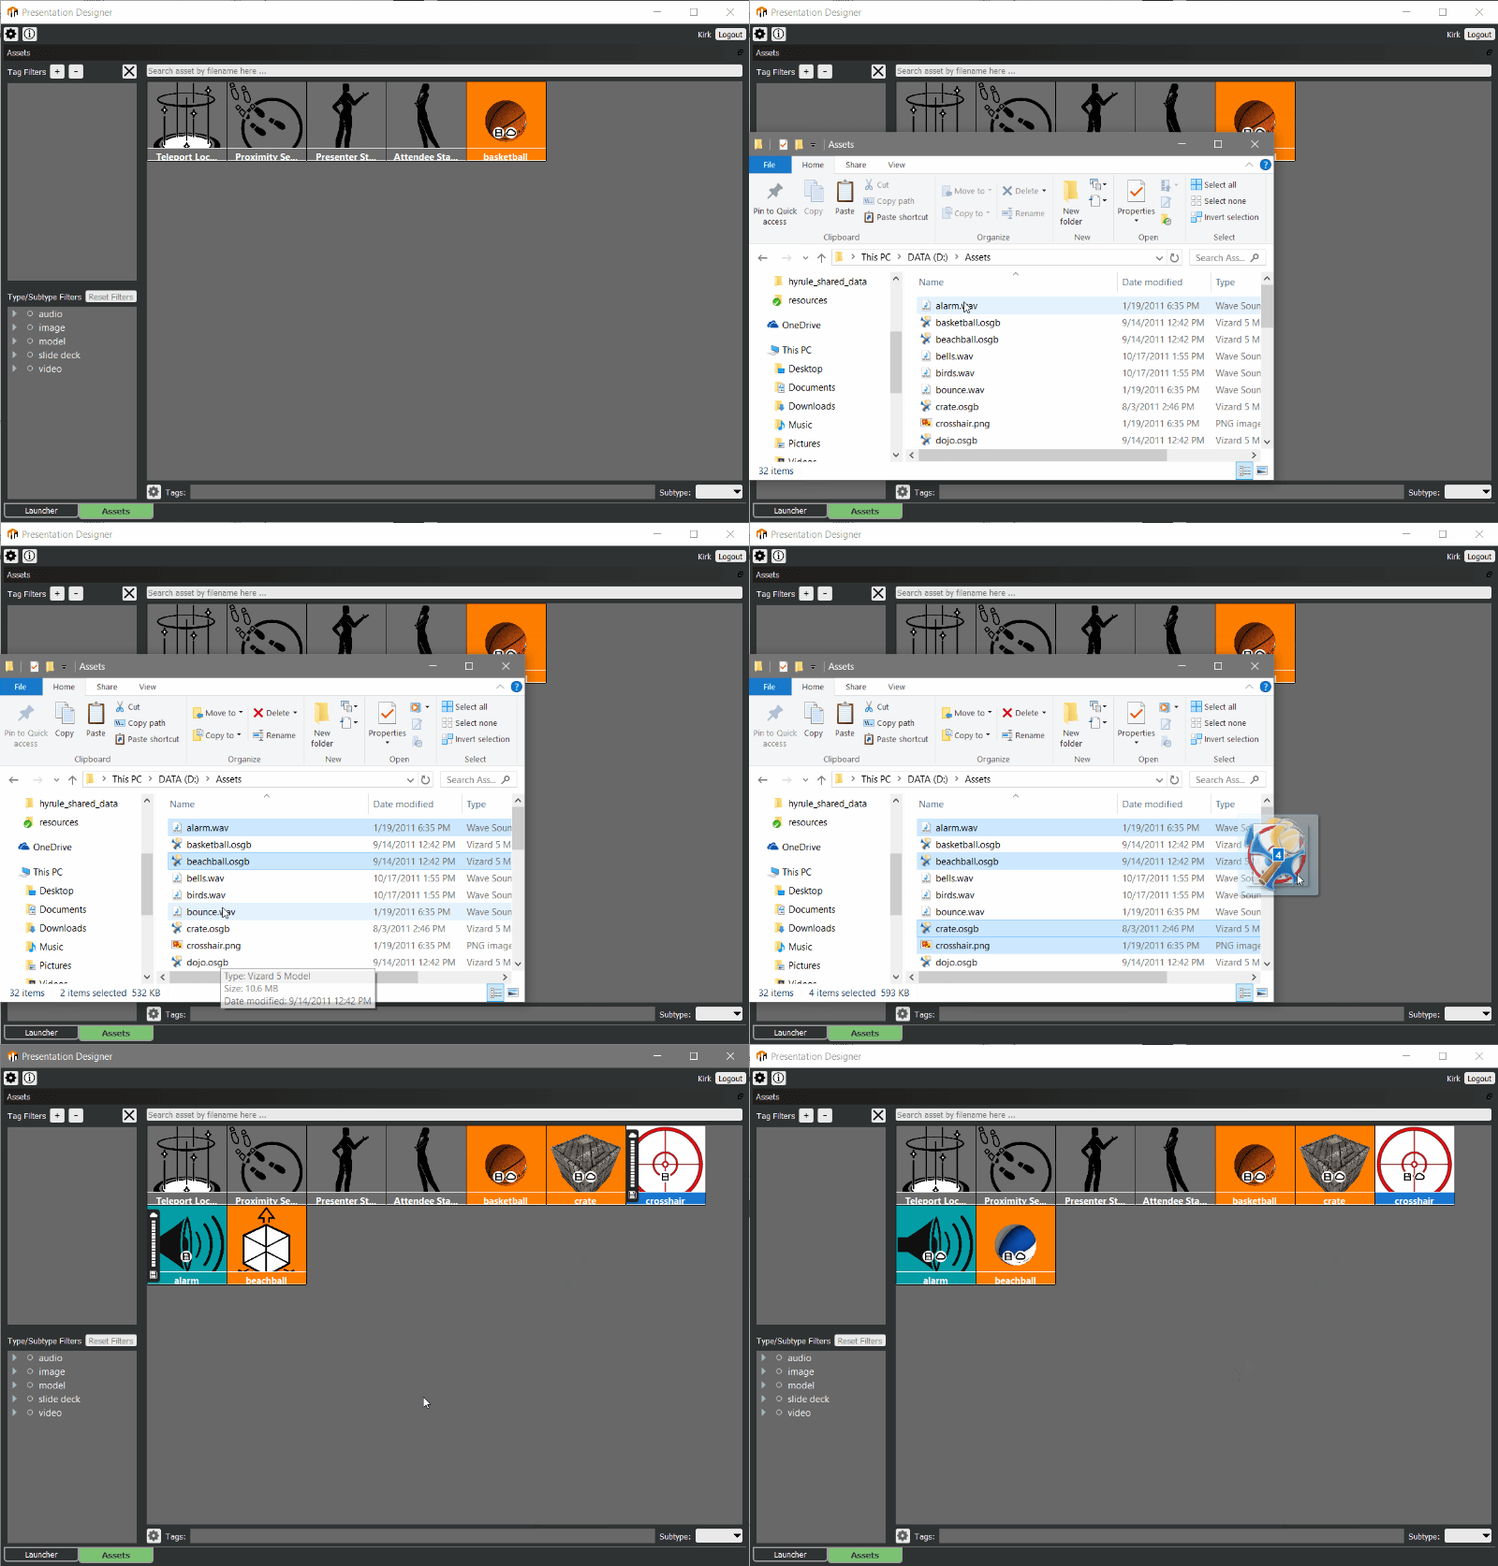
Adding one or more files using Drag and Drop

- Select the Assets tab
- In File Explorer, select the file(s) that you want to add as assets
- Drag and drop the selected files into the Assets window in Presentation Designer
- The assets will be added and uploaded to the cloud
- Any unsupported file types will be ignored!
Additional Notes
- When adding your local files as assets, they may require some time to be processed first and additional time to be uploaded. Presentation Designer performs this in the background for you without further intervention. When uploading, a progress bar is displayed on the left side of the asset thumbnail.
- If you close Presentation Designer while an asset is still being uploaded, it will try to upload the file again the next time you start Presentation Designer on that computer. If the asset was still being processed, you may have to repeat the process of adding it again. This is indicated by an exclamation point icon on the asset.
- To see more info on how to import different kinds of content into Vizible, see the section "Importing Content" in the documentation.